Showing posts with label Birthday Card. Show all posts

Saturday, April 26, 2014

Birthday Card in a Box

Cards in a Box are all the rage right now and I've been wanting to make one for a while but hadn't.  Then last week, Narelle from The Non-Crafty Crafter offered up a free Design Space cut file for her followers and that spurred me on to actually making this card for my godson's 21st birthday:


Supplies Used: 
Cricut Explore & Design Space Online Software
The Non-Crafty Crafter Cut File (card in a box)
Cricut Doodletype Cartridge (squares with rounded corners)
Cricut Life’s a Party Cartridge (birthday cake) 
Cricut Stretch Your Imagination Cartridge (balloons)
Cricut Celebrations Cartridge (presents and streamers)
Cricut Alphabet Cartridge (“21”)
Cricut Paper Lace Cartridge (Happy Birthday)
Recollections Card Stock (solid)
Martha Stewart Card Stock (patterned)
Twine (strings for balloons)
Various pens/markers for inking and highlights
Plastic Packaging (to adhere cuts to box)
Self-adhesive foam mounts
Glue

You can get Narelle's cut file for FREE by going over to her blog and follow her directions to get the file sent to you! CLICK HERE to go to Narelle's blog.

Thanks for visiting.


Thursday, April 24, 2014

Narelle's Pinterest Party!

The incredibly talented and beyond helpful Narelle (aka The Non-Crafty Crafter) is having a Pinterest Party on her blog! The "party rules" are simple:  (1) become a follower of Narelle's blog (trust me you won't regret it if you do),  (2) go to Pinterest and pick any craft project, and (3) make it.

Here's my project:


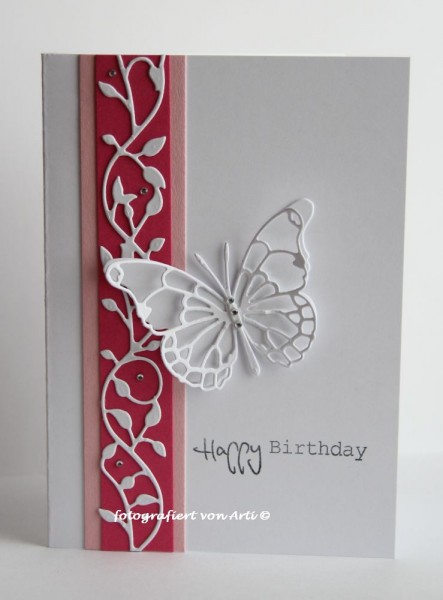
It's based on this card to the right from the Karten Kunst Blog (I hope that I've gotten the name right - my German is virtually non-existent).  I had pinned this a little over a month ago because I loved the  elegance of the Karten Kunst card.  I fear that my use of more and bright colors doesn't make my version measure up to the original.


Supplies Used: 
Cricut Explore & Design Space Online Software
Cricut Ribbons & Rosettes Cartridge (flower border/circle boarder)
Cricut Disney - Tinker Bell & Friends Cartridge (butterfly)
Cricut Calligraphy Collection Cartridge (Happy Birthday)

Recollections Card Stock
Self-adhesive foam mounts
Glue

Thanks for checking out my card and please be sure to visit Narelle's Blog.


Monday, April 14, 2014

Birthday Card with a little Mixed Media

Here's my first attempt at incorporating some mixed media into a card:


For the mixed media component, I cut a stencil from some plastic packaging I had saved and used it to stencil some drywall compound mixed with Silks Acrylic Glaze directly onto the card base.  I wasn't happy with the color, so I rubbed Inka Gold Metallic Rub over the stenciled area after it had dried.

I am entering  this card in the Die-Namites Blog April "Egg-Cellent" sketch challenge as my tak on the the sketch:

I turned the  Die-Namites Elegant Flake Die into a lace boarder by cutting each "arm" of the snowflake off, colored it with Inka Gold Metallic rub and arranged them into a straight line across the card.  I also used the leaves from the Winter Branch Die-Namites Die for the  leaves behind the paper roses.

Supplies Used: 
Cricut Explore & Design Space Online Software
Cricut CTMH Artiste Cartridge (roses)
Cricut  Winter Wonderland Cartridge (gift)
Cricut Paper Lace Cartridge (damask boarder - for stencil)
Plastic Packing (for stencil)
Synko Drywall Coumpound
Silkes Acrylic Glaze (
Inka Gold Metallic Rub (Gold)
VersaMagic Chalk Ink (Spanish Olive)
Recollections card base 
Martha Stewart Edge Punch  (Double Loops)
Cuttlebug Machine
Die-Namites Die - Winter Branch
Die-Namites Die - Elegant Flake
Spellbinders Page Maps  Die - Tags & Flags
Recollections Glimmer Cardstock
Dollar Store Metallic Cardstock 
Anna Giffin Georgette Christmas Collection (patterned cardstock)
Craft Smart Embossing Pad
Gold Embossing Powder
Stampin' Up Teen Tiny Wishes Stamp (sentiment)

Stampin'Up Word Window Punch
Dollar Store Tulle Ribbon
Pleather Gold Strip (scrap from my stash)
Self-adhesive foam mounts
Glue

Thanks for checking out my card.

Sunday, March 2, 2014

My Favourite Colour Birthday Card

This winter has been so cold and long that I decided I need some flowers in my life even if they were only made out of paper.  Here's a card that incorporates one of my favourite colours (purple) and some paper flowers:
 

Supplies Used:
Cricut Expression 2& Cricut CraftRoom Application
Cricut  Edge to Edge Cartridge (scalloped square, lattice and doily)
Cricut  Close to My Heart - Art Philosophy Cartridge (leaves and background lace cut)
Cricut  Paper Lace Cartridge (lacey square)
Notecard card base (5¼" x 5¼")
Recollections White Gold Shimmer Cardstock
Recollections Cardstock (yellow & while)
Brads (for flowers)
Happy Birthday Table Confetti (sentiment)
Flat Back Pearls from the Dollar Store
Cuttlebug Machine
Spellbinders Nestabilties  - Big Scalloped Oval
Memory Box Grapevine Wreath Die
VersaMagic Chalk Ink - purple
Self-adhesive foam mounts
Glue


I'm also submitting this tag for the Fantabulous Cricut Challenge Blog's Challenge #199 All About You Use Your Favorite Colors.

Thanks for checking out my card.

Wednesday, September 19, 2012

Monochromatic Cupcake Birthday Card

The third challenge for the Cricut Circle’s Canadian Online Swarm is to create a birthday card using a least one Cricut cut, a Cuttlebug folder and the following sketch:

For this challenge, I wanted to challenge myself with a monochromatic palette that focuses on pattern/texture rather than colour.  Here’s my 5”X5” card entry:
On the card is my attempt at making a more realistic looking cupcake than I have in the past.  The cupcake itself was cut at 3” while the corresponding wrapper was stretched wider using Cricut CraftRoom (the original dimensions of the wrapper before stretching were 2.694 by 1.611 and after stretching the dimensions were 3 by 1.611), so that the wrapper would be the right width after running it through a paper crimper. The icing cut on the cupcake was painted with puffy paint that was heated to activate the puffing.  Once dry, I covered it with Glossy Accents and then sprinkled glittered on it.
Supplies Used:
Cricut Expression & Cricut CraftRoom Application
Cricut Artiste Cartridge (cupcake)
Cricut Art Philosophy Cartridge (square with rounded corners)
Cricut Tags, Bags, Boxes & More Cartridge (tag)
Fiskars Paper Crimper
Martha Stewart Scoring Pad
Cuttlebug Moroccan Screen Embossing Folder
Sizzix Three Dots.Embossing Folder
Zig Opaque Writer (doodling on balloon and letters)
Inkssentials Glossy Accents
Tulip White Puffy 3D Fashion Paint
Chunky Glitter
Cardstock from my stash
Memento Ink – London Fog (inking cuts)
Studio G “Happy Birthday” Stamp
Craftsmart Embossing Pad
Stampendous Embossing Powder (Silver)
Lace
Ribbon

While there is a lot of sparkle on this card both with the glitter, lace and silver paper, I think the monochromatic tone make this card suitable for a man as well as a woman.  I’d love to hear if you agree.

Saturday, August 4, 2012

Birthday Card Using Art Philosophy

Here's a simple card I made using the Art Philosophy Cartridge:
I cut the butterflies from a transparency sheet, inked the entire cut, covered them with embossing powder and heated carefully with a heat gun.  I really liked how they turned out as an embellishment.

Supplies Used:
Cricut Expression & Cricut CraftRoom Application
Cricut Art Philosophy Cartridge (Butterflies & Label)
Zing Embossing Powder (Blue)
All Night Media Embossing Powder (Gold)
Studio G Stamp (“Happy Birthday”)
Craft Smart Embossing Pad
Plain Paper - Recollections
Patterned Paper - DCWV
Copic Markers
Beads and Wire from my stash
Celebrate It Brown Tulle
Rhinestones from the Dollar Store
Transparency Sheet
Embossing folder from the Cuttlebug WinterWonderland set

Thank you for visiting my blog.

Sunday, July 29, 2012

Winnipeg Hockey Fan Birthday Card


My brother is a huge Winnipeg Jets fan and I made him this card for his birthday:
The paper doll is meant to look like him in his team jersey.  I used rectangles and triangles from the Cake Basics Cartridge welded together with Cricut CraftRoom to make the jet on the logo. The maple leaf on the logo is from the Go Canada Cartridge.  I wrapped steel wire around two copic makers to make the glasses.

Supplies Used:
Cricut Expression & Cricut CraftRoom Application
Cricut Paper Dolls Everyday Cartridge (Doll & Clothes)
Cricut Paper Dolls Dress-Up Cartridge (hair)
Cricut Art Philosophy Cartridge (Banner)
Cricut Cake Basics Cartridge (shapes for logo)
Cricut CraftRoom Basics Cartridge (circles for logo)
Cricut Go Canada Cartridge (Maple Leaf)
Zing Embossing Powder 
Studio G Stamp Happy Birthday To You
Craft Smart Embossing Pad
Versa Fine Onyx Black  Ink Pad
Peachy Peen Groom Faces Stamps
Googly Eyes
Plain Paper Recollections
Patterned Paper DC WV The Blossom Song Stack
Copic Markers
20 Gauge Galvanized Steel Wire


Monday, July 23, 2012

Teen Birthday Card

This month's Circle Magazine Challenge is to use the Circle exclusive cart Out of Character (one full image cut including layers)  to create a project. Since my youngest daughter's birthday is around the corner and she views being called a Diva as a positive, I decided to incorporate the Diva cut from Out of Character into a birthday card for her.

The teen carrying the cake is cut from the Paper Dolls Teen Scene cart.  The dolls do not have mouths, so I stamped a Peach Keen face stamp onto a separate piece of paper and hand cut the lips form the image for the doll.  I also added a little three dimension nose inspired by the noses on some of the projects done by the very talented Nadia on her With Glittering Eyes blog.


The cake itself is a piece of confetti with white enamel accents added for the icing.  Since this card was for a teen girl, I was liberal with the rhinestones and glitter.


Supplies Used:
Cricut Expression & Cricut CraftRoom Application
Cricut Paper Dolls Teen Scene Cartridge (Teen)
Cricut Out Of Character Cartridge ("Diva")
Cricut Life's A Party Cartridge ("Birthday')
Cricut CraftRoom Banners Cartridge (Banner)
Peachy Keen Stamps blushing bride interchangeable faces (lips)
Copic Markers (inking cuts)
Stampology ink pad - Ruby 

Sizzix Embossing Folder - Three Dots
Recollections paper
DCWV The Cherry Limeade Stack paper
Martha Stewart Glitter - golden beryl
Recollections Black Blank Card Base
Rhinestones from my stash
Stickles (candle flame)
Inkssentials White enamel accents
CakeConfetti from my stash
Glue Stick
Self-adhesive foam mounts


I'm very pleased with this card and I think my crafting is actually showing some improvement. Thanks for looking and, as always, I'd love to hear what you think.

Thursday, July 5, 2012

Girlfriend Birthday Card

I love the Girlfriends stamp sets from Art Impressions and the one I used on this 5"X5" card is called "Out to Lunch":


I cut a circle out of  white cardstock, stamped the image on the circle and colored  the image with pencil crayons.  


The daisies on the lower left of the card were a pain to cut that small (1/2 inch), especially since each daisy is three layers of the same cut (Daisy2) from the Flower Shoppe Cartridge. It took twenty cuts to get the nine good pieces that I used for the three daisies.


The Happy Birthday sentiment is a piece of confetti to which I added some iridescent glitter to soften the color so that it was closer match to the ribbon I wove through the card base. 

Supplies Used:
Cricut Expression & Cricut CraftRoom Application
Cricut Wild Card Cartridge (Doily Card Base)
Cricut Flower Shoppe Cartridge (Daisies)
Cricut CraftRoom Basics Cartridge (Circles)
Art Impressions "Out to Lunch" Girlfriend Stamp
White and yellow cardstock  (scraps from my stash)
"Happy Birthday" Confetti
Celebrate It Ribbon
Hot Fix gems
VersaFine Black Ink Pad
Crayola Pencil Crayons
Iridescent glitter 
Inkadinkado Blending Chalks (soft tones)
Self-adhesive foam mounts

Thanks for looking.

Sunday, June 3, 2012

Birthday/Un-Birthday Card & Gift Bag

Several years ago, we took a family trip to Disney World.  As part of the trip, we had booked our two daughters for a “princess” experience at the Bibbidi Bobbidi Boutique in preparation for a Pirate & Princess party that was taking place in the evening.  My eldest had previously seen an Alice in Wonderland costume at Downtown Disney, but unfortunately the Boutique did not offer that costume as one of the "princess" choices, so she opted to get the “Crown Package” which included hairstyle, nails, make-up, but no dress, shoes or photo shoot.

After the makeover, we went on a hunt throughout Magic Kingdom for the Alice costume to no avail.  My dear husband then took our eldest daughter on a roundabout trip back to Downtown Disney, so that she could buy the Alice dress, change and get back to Magic Kingdom in time for the Pirate & Princess party.  Here she is in her costume.

Well, my eldest little princess is no longer so little, but she still has a fondness for Alice in Wonderland -- though she’s favours the Red Queen over Alice these days.  So, I thought for her birthday it would be appropriate to give her a Red Queen card, but an Alice gift bag for while she is getting older, that little girl is still a part of her.

Here’s the card:

 The card is 5.5” x 5.5” and the Red Queen is on a homemade wobble spring.

Here’s the altered gift bag:

Supplies Used:
Cricut Expression & Cricut CraftRoom Application
Cricut Art Philosophy Cartridge (Banner)
Cricut Disney Classics Cartridge (Alice and the Queen)
Glossy Accents (Queen’s Crown and Earring)
Zig Opaque Writer (drawing in the whites of the eyes)
Sharpie Markers (drawing in the iris and lips)
Copic Markers (inking some of the carstock)
Sentiment Computer Generated on MS Word
Celebrate It Ribbon
Florist wire (for wobble spring)
Heart Confetti
Gift Bag from Michaels
All Card stock (except card base) was scraps from my stash
Wausau Bright White Premium Card Stock (card base)
Sizzix Embossing Folder (from the "Love Set")
Sewing Machine and white thread

If anyone is curious about the reference to the un-birthday in the sentiment, an un-birthday is any day that is not a person’s birthday.  In the Disney animated film Alice in Wonderland, Alice comes upon the Mad Hatter, the March Hare and the Dormouse having an un-birthday party.  The Mad Hatter explains un-birthdays to Alice, she realizes it is her un-birthday as well and the Mad Hatter presents Alice with an un-birthday cake.  The un-birthday reference seemed more appropriate sentiment for the card than the Queen’s typical “off with her head”, don’t you think?

Monday, March 19, 2012

Bright Birthday Card

Here's the second of two cards that I made 14 of for an online Cricut Circle Canadian Members all occasion card swap (which was open to US residents as well):


I started with an A2 card base and scored and folded the front of the card in half.  I added and additional piece that started at about  five inches wide but scored and folded it to fit into the flap that was created by scoring the card base.   This second piece became the front of the card. 

 When you open the front, there is the second layer:


Finally, you open that and there is the inside of the card:


Supplies Used: 
Cricut Expression & Cricut CraftRoom Application
Cricut Beyond Birthdays  (“Happy Birthday”)
Cricut Celebrations Cartridge (balloons)
Cricut Walk in My Garden Cartridge (flower)
Martha Stewart Scoring Pad
Cuttlebug Moroccan Screen Embossing Folder 
Embroidery Floss (balloon strings)
Zig Opaque Writer (doodling on balloon and letters)
White Inkssentials Enamel Accents (flowers centres)
Studio G “Celebrate” Stamp
Craftsmart Embossing Pad 
Stampendous Embossing Powder (opaque white)
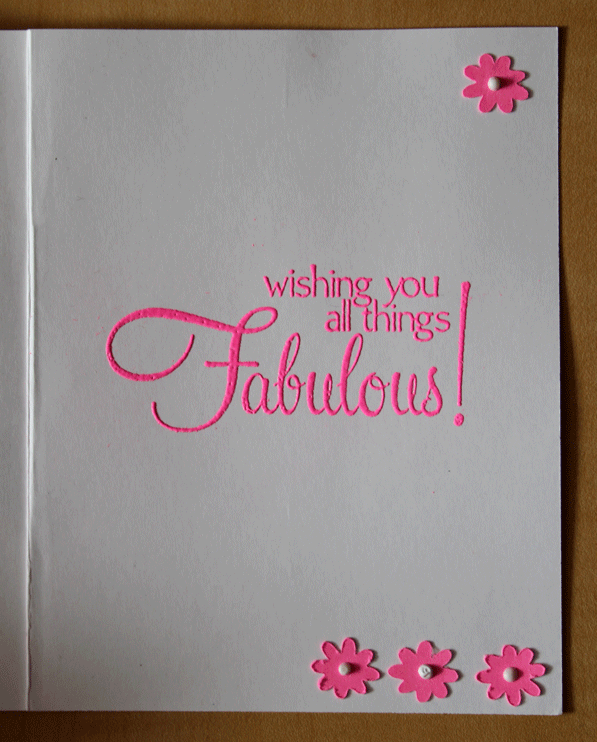
Zing Embossing Powder (neon pink)
Hampton Art “Fabulous” Stamp
Patterned Paper: Costco 
Solid Cardstock Recollections
Studio G chalk ink (shading on balloons)
Glue stick
Decorative accents (skittles)

I hope the card will be well received by the swap participants. I know neon pink and green are not everyone’s cup of tea, but what can I say - I’m grew up in the eighties.  Thanks for looking.

Tuesday, November 15, 2011

Simple Birthday Card & My Neglected Husband

Do you know the saying "the shoe maker’s son has no shoes”? It refers to the cobbler spending so much time repairing the shoes of his customers that he doesn’t have the time to repair his children's shoes.  Well, that's how my husband feels about my card making these days.  I've been busy making gift tags for a swap (come back tomorrow to see the tag), so I threw together the following simple card for his birthday from scraps in my stash and using the Cuttlebug A2 Happy Birthday folder:


He made it known that while he thought the card was cute, he was a little disappointed he didn't get a more elaborate one.  I'll have to make it up to him on the next card I make for him.

Saturday, September 10, 2011

Tri Fold Shutter B-day Card

Here's my first attempt at a Tri Fold Shutter Card. 


I made the fan fold rosettes using my Martha Stewart Scoring Board.  I used a 1.5 inch by  12 inch strip of paper for the bigger one, fan folded it, glued the ends together to make a circle, stood the circle up and then pushed the  top edge down toward  the centre.  This was glued onto a .5 inch circle to keep the rosette together.  The smaller rosettes were made the same way except  I used a 1 inch by 12 inch strip of paper. 

The butterfly and flowers were from my "stash" (clearance finds from Michael's).

I stamped the sentiments (inexpensive Studio G stamps) and I used gold embossing powder to give them dimension.

The only Cricut cut on this card is the frame in the centre which was cut from Ashlyn's Alphabet.  I intentionally left it blank to be used for a personal handwritten message


The coordinating envelope was made from a 8 3/4 by 8 3/4 sheet of card stock using the envelope scoring instructions that came with the Martha Stewart Scoring Board.

I'd love to hear your comments on this card.

Thursday, September 8, 2011

Simple Birthday Card

Here's a quick birthday card I made using my stash. 


No Cricut cuts, no embossing, no stamping ... its a wonder I managed to make it at all.

Saturday, July 16, 2011

Butterfly Birthday Easle Card

Here's a card I made  quite a while ago using the followng Cricut cartridges: Lyrical Letters ("Birthday Wishes"), Accent Essentials (flowers), Indie Art Solutions (butterfly) & Mother's Day Seasonal  (border).


The butterfly was cut using plain vellum that was inked softly for some colour.  The body of the butterfly is inexpensiv pearl beads coloured black with a sharpie.


The sentiment on the inside was printed using MS Word.


Thanks for looking.

Wednesday, June 1, 2011

Cupcake Birthday Card

Have you ever made a card that you think is awesome in concept, but disappoints in execution?  This card is that for me.


This card is cut from the Wrap it Up cartridge at 6".  The patterned carstock is K&Company "citronella".  The outstide sentiment is confetti I picked up at Pier 1 last year.  The inside sentiment is cut from the Base Camp cartridge at 2".

The icing on the cupcake is Stickles Glitter Glue with bugle beads as sprinkles in fushia, gold and turquoise.

Thanks for looking.

Monday, May 30, 2011

Happy Birthday Card for my Mama

One of this month’s Cricut Circle magazine contests is to use the current magazine as a stepping off point for a creation. The rules require the use of at least 3 Cricut cuts and an idea from the magazine in the project.

My mother’s birthday is in June, so I decided to use Lisa Falduto’s “You Are My Sunshine” card on page 43 of the magazine as my inspiration for a card for my Mama.  This is Lisa's card:


and here’s my card:
The rose is cut at 3.5” from Walk in my Garden cartridge.
The frame for the sentiment is cut from French Manor cartridge using Design Studio to customize the size (3.25”X1.75”) and to hide some contours.    The shadow for the frame is the same cut, but at larger size (3.5”X2”). 

 The “Happy Birthday” is computer printed.
The “Mama” is from Mother’s Day 2010 cartridge and again I used Design Studio to customize the size at 0.7” height.  I cut the shadow from cardstock, but the main phrase was cut from vinyl.

Cardstock was  various ones from my stash and the ribbon is a sheer white one that I colored with a gold sharpie.  I also added three decorative accents which are available at Michaels' floral department.

Saturday, May 28, 2011

Cricut Circle Monthly Challenge

For this month’s CC challenge, there is a Tic Tac Toe board with a design element in each of the squares and you need to choose three squares in a row and use all three design elements in your project.
I decided to make a card (surprise surprise) and chose a diagonal row with the following design elements:  (a) use a cut of a flower shape, (b) use a paper, ribbon or something else to create a ruffle , and (c) use buttons somewhere.

Here’s the card I made for the challenge:

The flowers were cut from Pagoda cartridge.  The medallion parts were cut with the Accent Essentials cartridge (I had to use design studio to hide a contour to get a clean scallopped circle).  The medallion was made using the instructions from this post by Mustang Sarah Creations.  I used a grosgrain ribbon to make the ruffle and the same ribbon is in the medallion.  The paper is from a stack that I picked up at Costco that I don’t know the name of plus some scraps I had laying around.    The sentiment is stamped with a stamp from G Studio.